Bitcoin has taken the world by storm ever
since its inception on January 5, 2009. It’s been busy in those five
short years, having been called the currency of the future, a threat to
central banking systems, and we’ve even seen China, Russia, and most
other governments put restrictions on Bitcoin transactions.

Whether you think Bitcoin is a beauty or a beast, it’s obviously here to stay for the time being. If you’re enthralled by the idea of a cyberspace currency, and would like to learn how to integrate Bitcoin donate buttons into your WordPress blog, then you’re in the right place. But first, a few words about exactly who that new kid on the currency block really is.
What Is Bitcoin?
In short, few really understand how Bitcoin works.But there are a few things we do know. For one, it’s a completely virtual currency, which means that you can’t pay Bitcoin in bills, notes, or even a real coin. All payments occur in the cyberspace. Secondly, there’s a huge amount of it, with the dollar equivalent of over $1.5 billion in Bitcoin circulating today — numerous transactions take place every minute.
You can pay for anything and everything with Bitcoin as long as the merchant in question accepts it. That includes marketing services, website memberships, car rentals, and — ahem, other stuff.
And, in light of this tutorial, you can also use Bitcoin to receive donations on your WordPress blog (or any website, for that matter). Here’s how.
Step 1. Create Your Bitcoin Wallet & BitPay Account
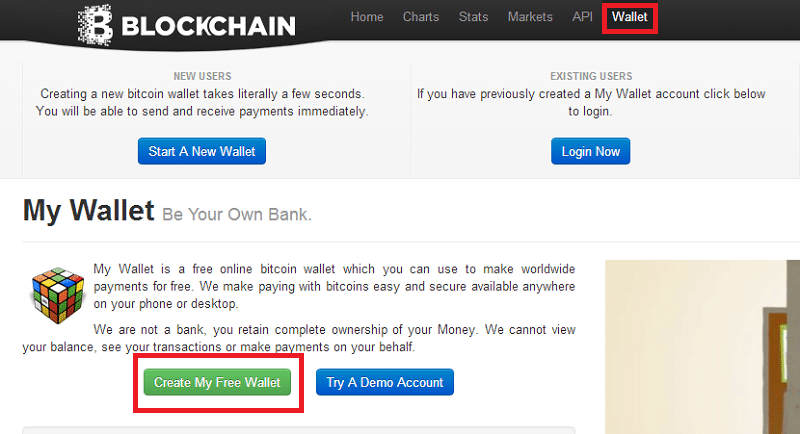
The first thing you need to do is set up your Bitcoin wallet — this is where all the bitcoins you receive will be stored. BlockChain is the most popular Bitcoin wallet service, due to the fact that it’s a free web-based app you can log into anytime from anywhere.Head over there, select Create My Free Wallet, and fill in the details required on the next page.
WRITE YOUR PASSWORD DOWN — unlike nearly every other Internet service, you won’t be able to recover your BlockChain password if you ever forget it. Furthermore, any bitcoins you might have owned in that account will then be lost forever.
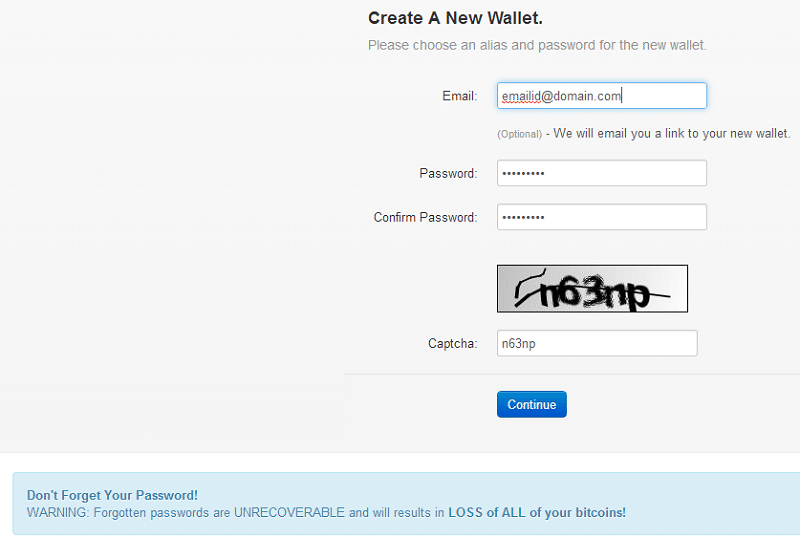
Forget your password? Sorry, bud.
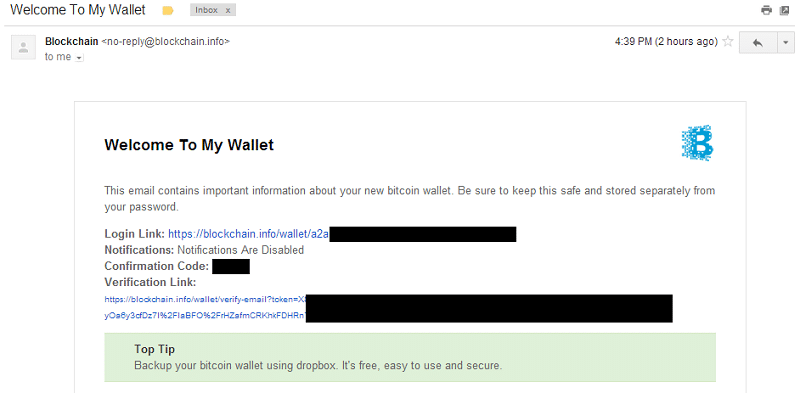
Verify your e-mail address, and click the login link.
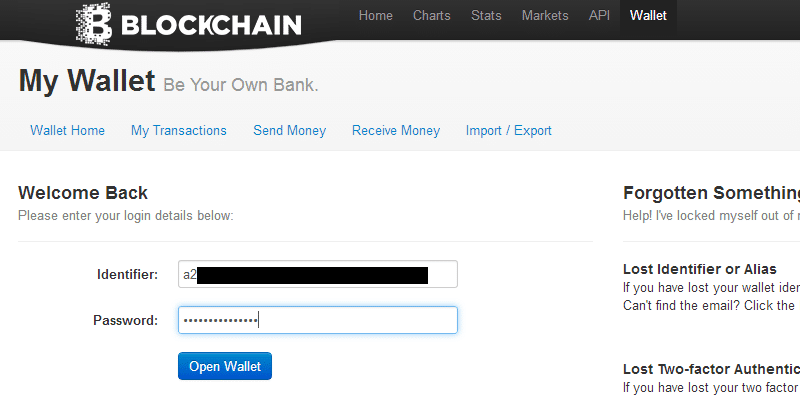
When
you click on your login link, you’ll be redirected here. Your
identifier will automatically be filled in — just key in your password.
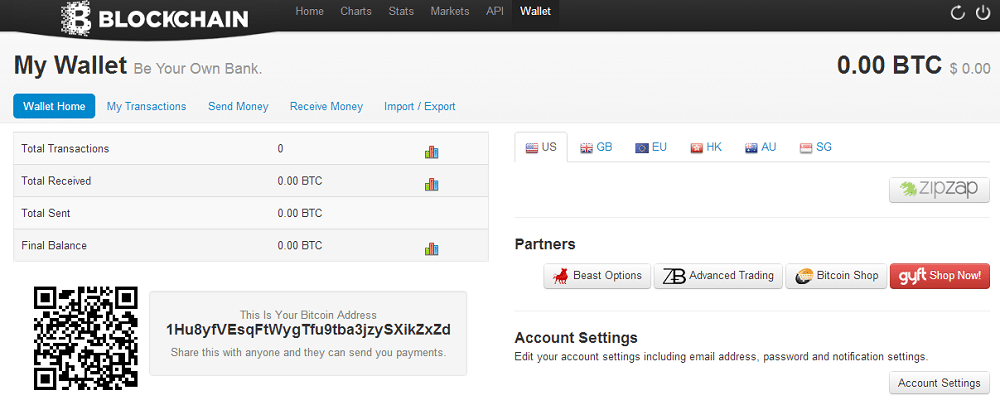
Now, head over to BitPay and create an account. Each account is manually activated, so you’ll have to wait a few hours after signing up to be approved as a member (you’ll be sent an e-mail notification when that happens).
If you’re a mite confused about the difference between Bitcoin, Blockchain, and BitPay, and why you need to sign up for all of them, think of it this way: Bitcoin is the money, Blockchain is your bank, and BitPay is essentially the same thing as PayPal for Bitcoin an e-payment system. Just like centralized banks and PayPal, BlockChain and BitPay have their own competitors and alternatives. But for the most part, they’re the most popular choices.
Step 2. Creating Your Donate Button
Following your BitPay account approval, login to your BitPay dashboard. Click on the Accept Bitcoin link in the top navigational menu (extreme left).Select the eCommerce option, and then Accept Donations on the next page.
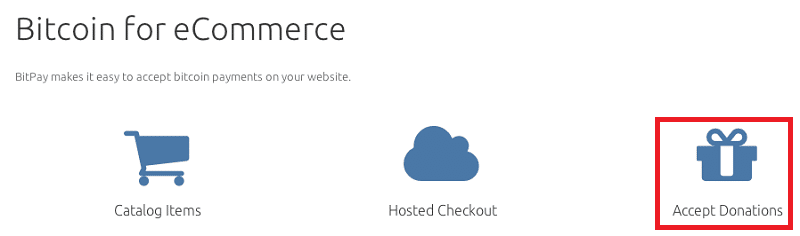
Here’s where you configure your Bitcoin donate button. You can pre-set the donation amount (e.g. $10) for that specific button, or you can allow donors to choose their own donation amount (my personal choice would be the latter option).
After selecting pre-set or custom donations, a few fields will pop up. Fill out the Merchant Name (your personal name or website domain), set a short description, and if you went with a pre-set donation amount, use the provided text box to establish that amount.
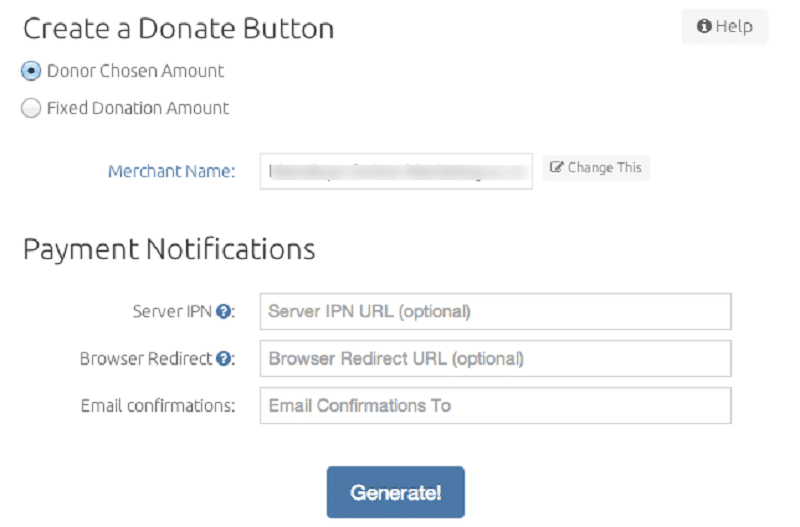
You can also customize the URL donors are sent to after completing a transaction (a thank-you page, for example). Lastly, enter a e-mail address to be notified every time a donation is made.
Once you’re all done with that, hit “Generate” to generate the HTML code for your Bitcoin donate button. You can choose from three default sizes: small, medium, and large. Copy the code provided and store it on your computer in a Notepad document.
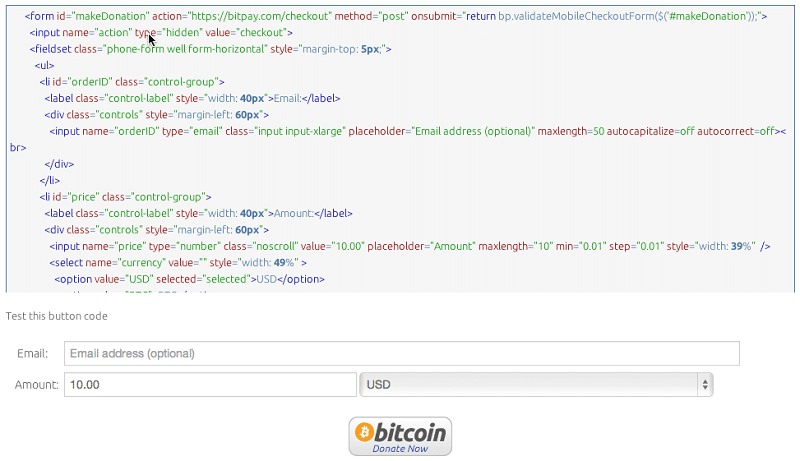
Copy this code.
Step 3. Inserting Your Donate Button in WordPress
Almost there, one last step: inserting the button code into your website. But you can’t just insert the generated HTML into the text editor of a page — you need to first ensure that it will work seamlessly with WordPress. To do that, create a shortcode in your theme’s functions.php file (Appearance > Editor > Functions.php) by copy/pasting the following code:
1
2
3
4
5
6
7
| function wpb_bitcoin_button() { ob_start(); [the bitpay code generated in step 2 goes here] return ob_get_clean();}add_shortcode('bitcoinbutton', 'wpb_bitcoin_button'); |
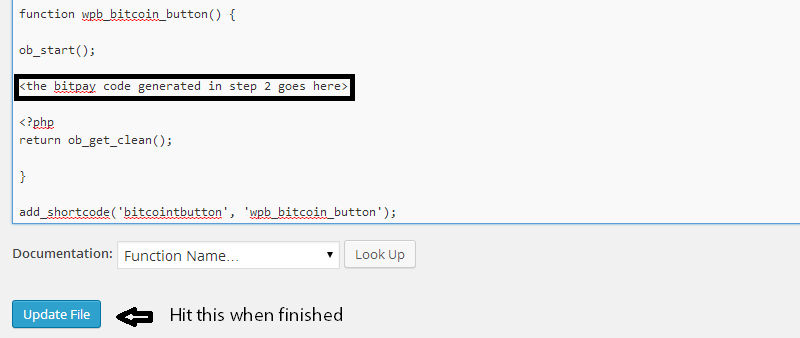
Here’s what that looks like in my theme editor.
And for your information, Kinsta WordPress hosting is now accepting Bitcoin payments. :-)
Before you leave, do me a favor and answer me this question: what’s your opinion of Bitcoin? Is it here to stay — permanently — or is it just another passing fad?
Leave your comment below (psst! Don’t forget to use the social sharing buttons, either)!
Found This Artical > https://kinsta.com/blog/add-bitcoin-wordpress/
